
Invisible contaminants like brake dust, railway line iron particles, industrial fallout, and paint overspray mist constantly bond to your car’s body. These tiny iron particles embed deep into the paint, creating a rough texture you can feel but often can’t see. Left untreated, they oxidize, causing dullness, rust spots, and permanent etching.
Regular iron powder removal with SurLuster’s Clay Cleaner prevents oxidation and rust while smoothing the surface dramatically—resulting in noticeably better wax or coating results, deeper shine, and longer-lasting protection.
Why Iron Powder Removal Is Essential
- Prevents oxidation and rust from iron particles turning into brown spots or haze.
- Restores a glass-smooth feel (eliminates that “sandpaper” roughness after washing).
- Allows wax and coatings to bond better and level out for a flawless, mirror-like finish.
- Recommended 1–2 times per year or whenever the paint feels gritty—especially for cars near railways, highways, or industrial areas.
Step-by-Step Iron Powder Removal Guide
Follow these safe steps using Clay Cleaner (clay bar) for professional decontamination without scratches.
1. Confirm Iron Powder Presence
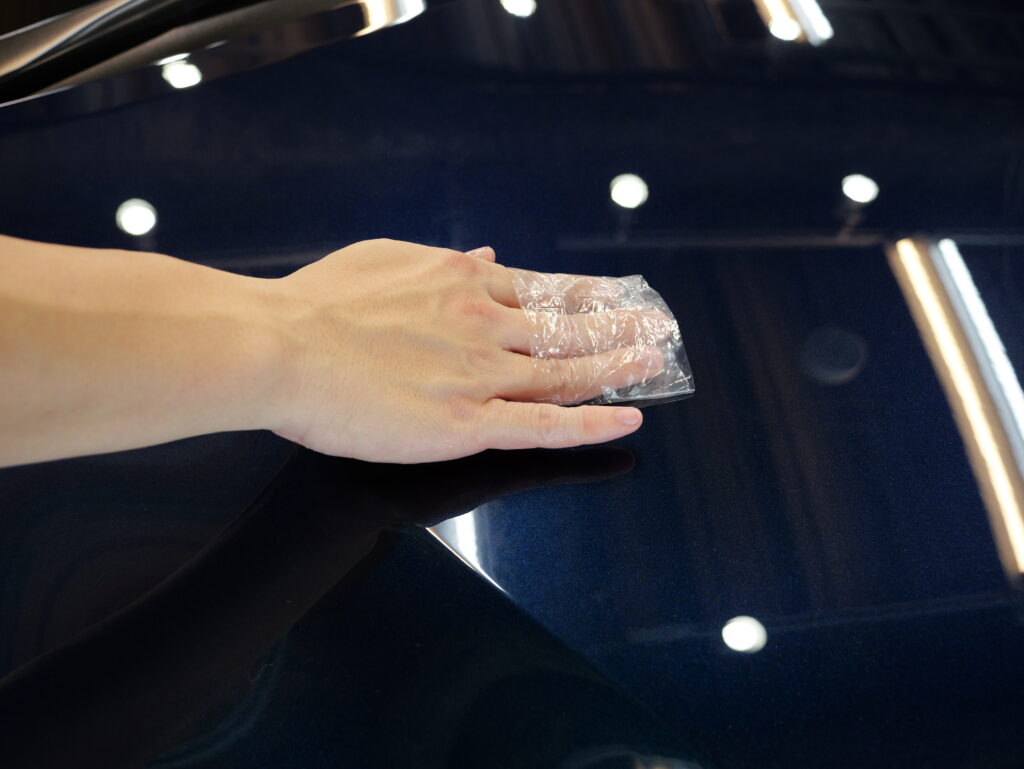
After washing and drying the car, test for iron:
- Use Iron Powder Check Film wrapped around your finger.
- Gently glide over the paint—if it feels rough, gritty, or catches, iron particles are embedded.
This quick test confirms when decontamination is needed.
2. Prepare the Clay Cleaner
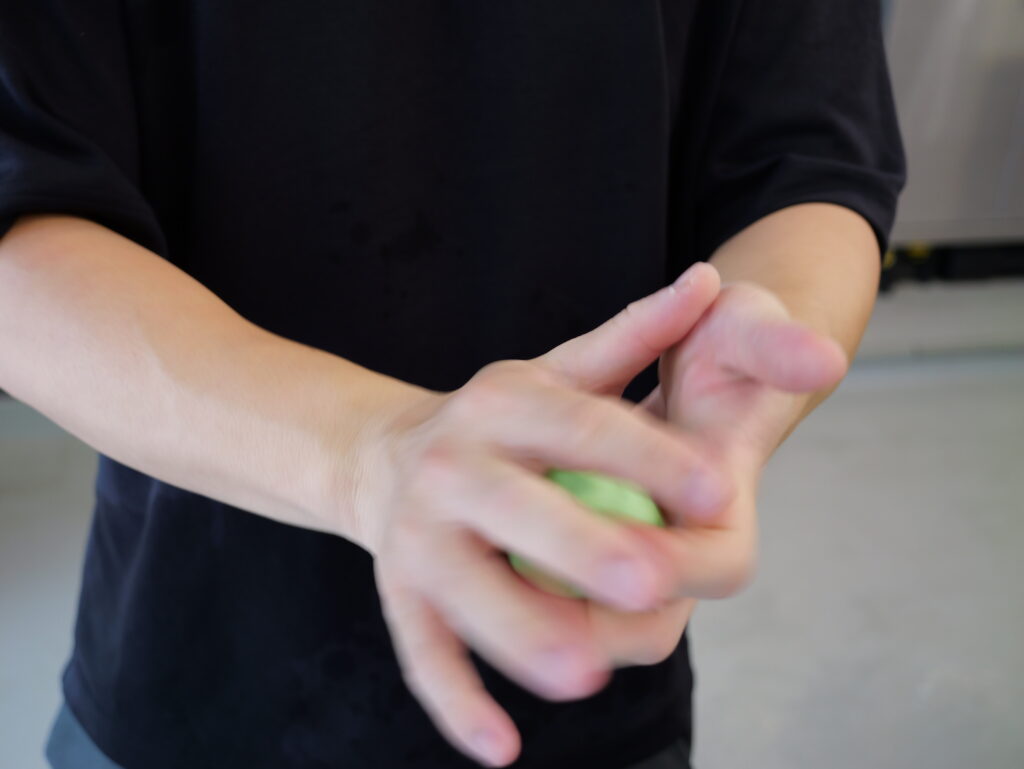
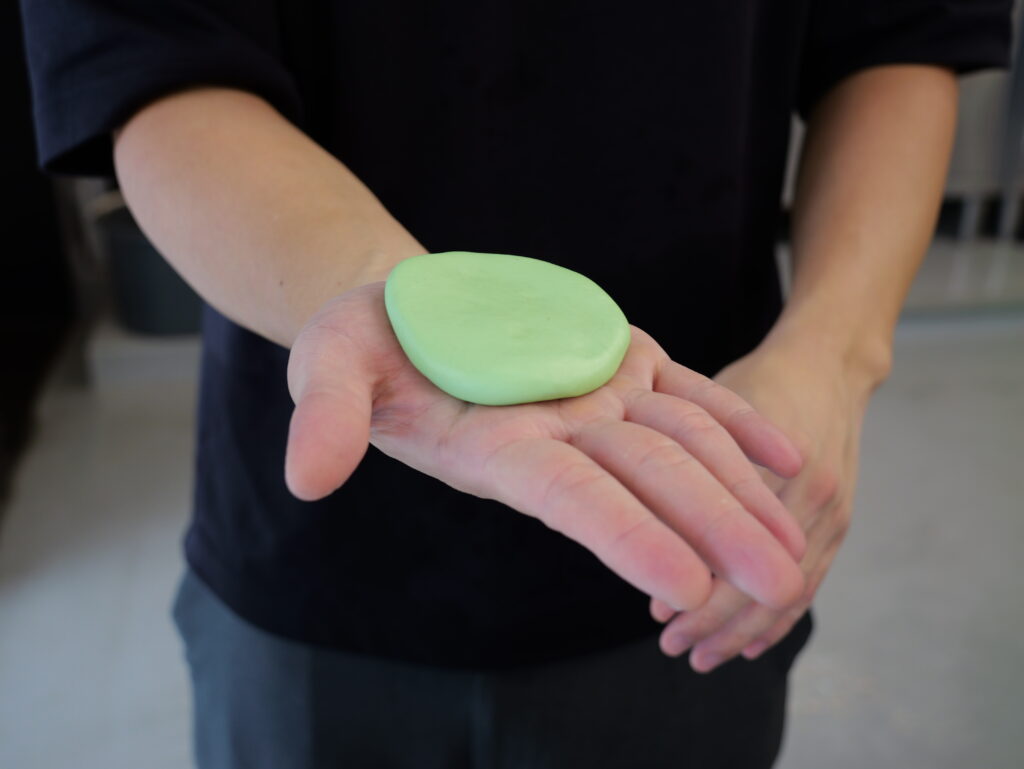
- Clay Cleaner starts firm—soften it first by soaking in water for a few minutes.
- Knead thoroughly in your hands until pliable.
- Flatten to about 1 cm thick and shape into a palm-sized piece (roughly the size of your hand). This gives you a large, clean working surface.
3. Remove Iron Powder
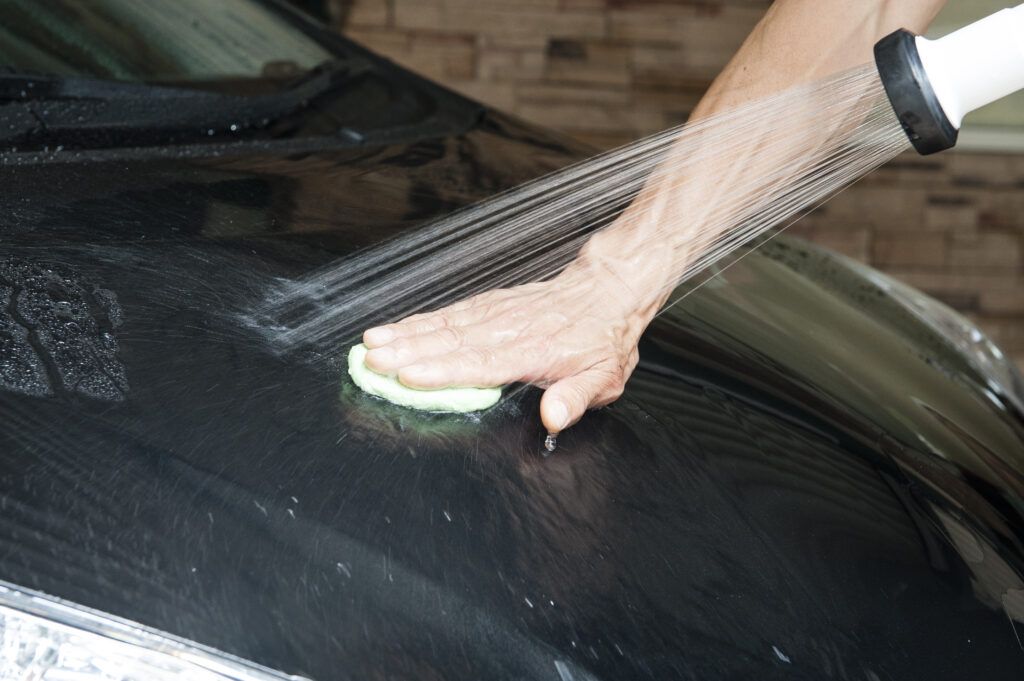
- Work in small 30 cm × 30 cm sections.
- Keep a steady stream of water flowing over the area (hose on low pressure) to lubricate and flush particles.
- Glide the Clay Cleaner lightly and gently in straight lines—no circular motions or heavy pressure (pressing hard causes marring or scratches).
- As the clay picks up iron (it will turn gray/brown), fold the dirty side inward to expose a fresh, clean surface.
- Never reuse a dirty face—always work with a clean portion to avoid re-depositing particles and causing new scratches.
4. Final Rinse
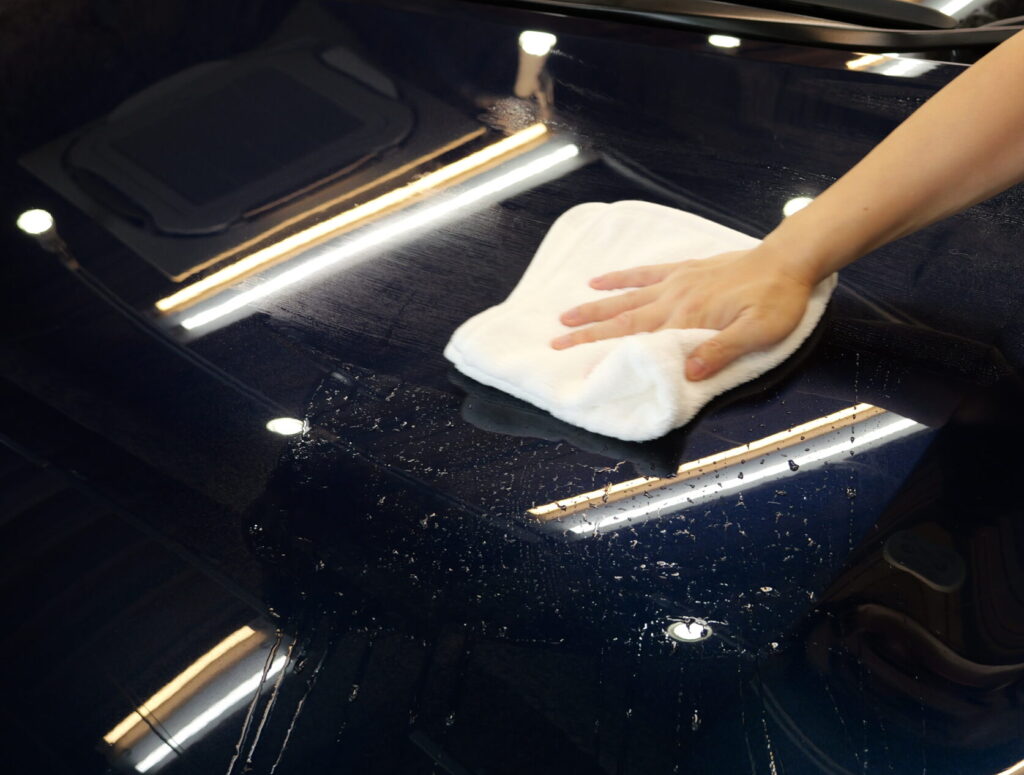
- Rinse the entire vehicle thoroughly with plenty of water to wash away any loosened iron particles or clay residue.
- Dry with a clean microfiber towel to inspect the now-smooth surface.
SurLuster One-Point Expert Tips
- Quick DIY iron check: Wrap a thin plastic around your finger and glide over the paint—any gritty feel means iron is present.
- If light marring occurs after claying (rare with proper technique), follow up with SurLuster Spirit Cleaner or water spot remover to polish it out.
- Never use Clay Cleaner if it falls on the ground—dirt picked up will scratch the paint immediately. Discard and use a fresh piece.
- For best results: Clay before polishing, waxing, or coating—clean surfaces maximize protection performance.
Master this iron powder removal step with SurLuster Clay Cleaner, and your paint will feel incredibly smooth, stay rust-free longer, and deliver dramatically better shine from the next care stages.
Next in the SurLuster Car Care Guide: Full Polishing – Tackle water spots, light scratches, and deeper imperfections for ultimate clarity and gloss!